This is only a basic guide to cleaning a basic watch movement and is intended for people who are just getting into watch repair but have good mechanic abilities. There are many factors to consider and some different procedures for watches with different functions. There are several tests and procedures that need to be preformed for various repairs that are more involved than I care to get into in this text such as escapement adjustment, friction jeweling, re-bushing, pivoting, staffing, lathe work and hundreds of other things, there are also many special tools that are used. I will be getting into some of these things at a later date.
Proper cleaning and lubrication is one of the most important parts of watch repair. And is the most common thing that is done wrong. Every reputable watchmaker takes this very seriously and spends countless hours refining his procedures.
One extremely important and frequently overlooked thing is to be sure your hands, and surroundings are very clean and dust free. One speck of dust, a tiny strand of hair or lint or piece of dead skin can and most of the time will stop even a large watch movement. A tiny piece of dead skin will cause all kinds of headaches and is very, very hard to detect so be careful.
Be sure your screwdrivers are sharp and all your tools are clean and in good working condition.
If you are new to all this I would suggest that you practice on worthless or larger timepieces before you try to tackle smaller or more valuable ones.
And now that we have made it through all that jibba jabba lets get started.
Basic Mechanical Watch Movement Parts Nomenclature.
| 1. Train bridge | 23. Lower escape wheel pivot / cap jewel |
| 2. Third wheel | 24. Escapement inspection holes |
| 3. Upper third wheel pivot / hole jewel | 25. Lower pallet arbor pivot / hole jewel |
| 4. Set lever screw (detent screw) | 26. Lower balance pivot/ cap jewel |
| 5. Transmission wheel (Crown wheel) | 27. Click |
| 6. Ratchet wheel (Winding wheel) | 28. Click spring |
| 7. Barrel bridge | 29. Upper center wheel pivot / hole jewel |
| 8. Clutch wheel | 30. Center wheel |
| 9. Winding pinion | 31. Balance cock |
| 10. Set lever | 32. Regulator |
| 11. Stem | 33. Upper balance pivot / cap jewel |
| 12. Crown | 34. Escapement inspection notch |
| 13. Yoke spring | 35. Hairspring stud |
| 14. Setting lever spring ( set bridge ) | 36. Balance wheel |
| 15. Yoke | 37. Pallet bridge |
| 16. Upper forth wheel pivot / hole jewel | 38. Hairspring |
| 17. Set wheel | 39. Upper pallet arbor pivot / hole jewel |
| 18. Lower barrel arbor pivot / hole | 40. Pallets |
| 19. Minute wheel | 41. Escape wheel |
| 20. Mainspring barrel | 42. Upper escape wheel pivot / cap jewel |
| 21. Center shaft and cannon pinion | 43. Forth wheel |
| 22. Lower forth wheel pivot / hole jewel | 44. Hour wheel |
Balance Staff
| 1. Case as viewed from back |
| 2. Case lugs |
| 3. Case as viewed from Front |
| 4. Dial |
| 5. Hands |
| 6. Case back |
| 7. Crystal |
| 8. Bezel |
| 1. Case screw | 23. Outer bit |
| 2. Upper pallet pivot hole jewel | 24. Center bit |
| 3. Upper escape wheel hole jewel | 25. Seconds bit |
| 4. Hairspring | 26. Lower third wheel hole jewel |
| 5. Upper forth wheel hole jewel | 27. Center shaft and cannon pinion |
| 6. Upper third wheel hole jewel | 28. Click spring |
| 7. Case screw | 29. Ratchet wheel |
| 8. Mainspring barrel | 30. Barrel arbor square |
| 9. Barrel bridge | 31. Ratchet cock |
| 10. Upper barrel arbor pivot | 32. Intermediate winding wheel |
| 11. Hairspring stud | 33. Yoke |
| 12. Balance cock | 34. Crown wheel |
| 13. Regulator star micro adjust | 35. Setting wheel spring |
| 14. Regulator | 36. Setting wheel |
| 15. Balance wheel | 37. Minute wheel and pinion |
| 16. Hour chapter | 38. Lower pallet arbor hole jewel |
| 17. Minute chapter | 39. Escapement inspection holes |
| 18. Enamel dial | 40. Lower escape wheel hole jewel |
| 19. Outer bit | 41. Lower forth wheel jewel |
| 20. Center bit | 42. Lower balance pivot cap jewel |
| 21. Seconds bit | 43. Hour wheel |
| 22. Dial feet |
Fusee Chain
The general dissasebly order is……
let mainspring down, remove stem, remove watch from case, remove hands, remove dial, remove hour wheel, remove cannon pinion, remove set bridge, remove setting parts and minute wheel, remove transmission wheel , remove ratchet wheel , remove click and click spring, remove mainspring barrel, remove mainspring barrel cover, remove barrel arbor, remove mainspring from barrel, remove balance cock and balance complete and set it on balance tack, remove train bridge/bridges, remove train wheels, remove pallet bridge, remove pallets, mark and remove any cap jewels from bridges and plate if shock proof springs are attached such as Incabloc be sure to secure them back into their settings or they will get broken off during the cleaning process, to remove balance from cock loosen hairspring stud screw on balance cock and push stud through with fine needle or broach some regulators have a pin that swings over the hairspring so be sure to swing it away if watch is so equipped, remove jewels from balance cock.
1. let mainspring down
Letting mainspring down
To let the mainspring down safely, you must disengage the click from the crown wheel while holding the crown. First, turn the crown clockwise just until the click releases and becomes free. Then, use a fine-pointed object to hold the click free from the crown wheel and let the power run down slowly using your fingers as a break on the crown to keep from releasing the power too fast.
This takes some practice. If the power is released all at once, damage to the barrel, wheels, pinions, or mainspring could result.
For watches with one-piece cases where the movement comes out the dial side and the case has no removable back, you will not be able to get at the back of the movement. For this type of watch you must grasp the crown firmly and pull it out. Or use plastic or soft brass tweezers to get behind the crown and pop it off. These watches have two-piece stems that have male and female ends that snap together. Then, remove the bezel and let the movement come out into your hands. Then remove the hands and the dial and put the movement face down into a movement holder. You will then need to use a pin vise to grip the stem and then let the power down, as described above using the pin vise like you would the crown.
2. remove stem,
To remove the stem you must first loosen the set lever screw, then you can pull the stem out.
You only need to turn the set lever screw a couple turns to release the stem. Some movements use a button instead and in that case you would simply push the button down lightly with a pointed tool and while holding the button down pull the stem out.
For watches with one-piece cases where the movement comes out the dial side and the case has no removable back, you will not be able to get at the set lever screw. For this type of watch you must grasp the crown firmly and pull it out, or use plastic or soft brass tweezers to get behind the crown and pop it off. These watches have two-piece stems that have male and female ends that snap together. Then remove the bezel and let the movement come out into your hands. Then remove the hands and the dial and put the movement face down into a movement holder. Now you can remove the stem as described above.
remove watch from case,
To remove the movement from the case you will first need to remove the bezel then remove any case screws or clamps. Then let the movement come out into your hand. For some watches, particularly pocket watches the movement comes out the dial side. For watches with one piece cases the movement comes out the dial side also.
remove hands,
To remove the hands you must first be sure there is no dirt or broken glass on the dial that will cause scratches so brush the dial lightly with a soft dial brush and blow off the loose particles with a blower. Line up the hands at 12, place a piece of paper or plastic with a V cut in it under the hands to protect the dial and use hand pullers or hand lifting levers to remove the hands.
remove dial,
To remove loosen the dial screws located around the perimeter of the movement and carefully pull the dial off the movement.
Some movements use sliding levers, for slide type ( found mostly on ETA movements ) use tweezers or a small screwdriver to slide the levers out and away from the dial feet.
Some movements have screws located on the plate side with small notches cut in them that when turned lock against the dial feet. To disengage loosen the screws until the notch lines up with the foot.
Some older movements use pins that go through the dial foot, for this type simply pull the pins out and the dial will be loose.
Some movements use only friction to hold the dial on the movement. (mostly quartz movements)
remove hour wheel,remove cannon pinion, remove set bridge, remove setting parts and minute wheel,
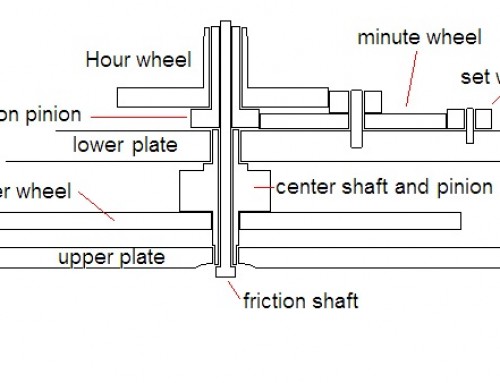
The motion work consists of the hour wheel which caries the hour hand, the cannon pinion which caries the minute hand and works like a clutch that slips on the center shaft and allows the hands to be set. The minute wheel slips on a shaft that is staked into the lower plate, the minute wheel meshes with the cannon pinion and its meshes with the hour wheel. The cannon pinion is friction fitted to the center shaft. The hour wheel slides onto the cannon pinion. The set wheel is usually under the set bridge and meshes with the minute wheel and the clutch wheel.
To remove the motion work you first pull of the hour wheel, then remove the set lever bridge bridge screws, remove the yoke spring, remove the yoke, remove the clutch wheel and the winding pinion, then remove the set wheel and the minute wheel, then pull the cannon pinion using a cannon pinion puller or sturdy tweezers.
Also most watches use a dial washer between the hour wheel and dial to hold the hour wheel down.
Some watches have hollow center shafts through which another shaft is friction fitted. The cannon pinion is then staked onto the end of the shaft that is friction fitted through the center shaft.
remove transmission wheel , remove ratchet wheel , remove click and click spring,
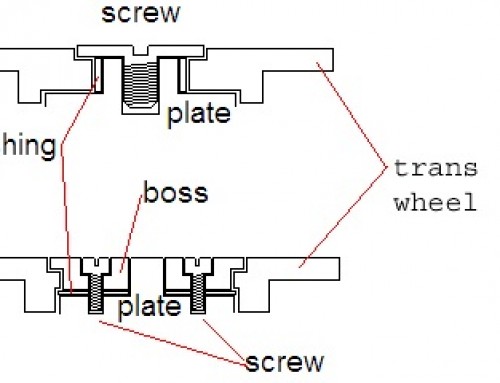
The winding parts consist of the winding wheel ( ratchet wheel ), Transmission wheel (crown wheel), clutch wheel, winding pinion, stem and crown.
To remove any screws, remove the crown wheel, remove the boss, remove the bushing.
Most common types pictured bellow
To remove the winding wheel, remove the screw and pull the winding wheel away from the barrel arbor.
To remove the click and click spring, remove the click screw and the click should then be free, then you can remove the click spring. There are many different forms of clicks and springs, some use round springs, some use a click and spring combined into one unit.
Most common click pictured bellow
remove mainspring barrel, remove mainspring barrel cover, remove barrel arbor, remove mainspring from barrel,
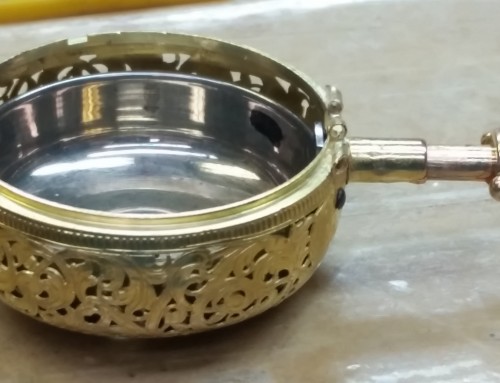
About the watch mainspring barrel and mainspring and how to remove it
The mainspring provides the power for the movement. It is one of the most important and frequently overlooked parts of a mechanical timepiece. The mainspring is contained in the barrel and wound by the arbor. The barrel components consist of the barrel and the barrel cover, which have bushings in them through which the arbor is held in place. The barrel arbor has a small hook on it that catches the hole in the end of the mainspring, and the arbor also has shoulders on which the barrel is carried and pivots on its ends that hold the barrel complete in place between the barrel bridge and pillar plate. The arbor also has a square on its top end and is drilled and tapped. This square accepts the square in the ratchet wheel and a screw holds the ratchet wheel in place on the arbor.
The barrel complete is held between the pillar plate and barrel bridge. The barrel bridge is held in place to the pillar plate by screws and steady pins.
To remove the barrel, first remove the ratchet wheel, now remove the bridge screws, then the bridge can be popped up using edge of a screwdriver. Most movements have notches cut into the edges of the plates and bridges to accept the blade of a screwdriver to release the bridge from its mating surface. After the barrel bridge has been removed the barrel can be
To remove the mainspring from the barrel, you will have to pop off the cover. To remove the cover, place the blade of a small screwdriver into the cutout in the edge of the cover and pry the cover up carefully until it pops off. Some barrel covers do not have a notch and need to be popped off by pushing on the arbor from the opposite side.
After the cover has been removed, use a pin-vise to grip the top pivot of the arbor and remove the arbor with a twisting motion. The mainspring can then be removed by pulling up on the center coil with a sturdy pair of tweezers until the coil clears the top of the others. Then, carefully allow the mainspring to slowly unwind out of the barrel using your fingers, taking care not to allow the spring to suddenly pop out all at once.
Some common mainspring end types pictured bellow
Mainspring shapes pictured below
remove balance cock and balance complete and set it on balance tack,
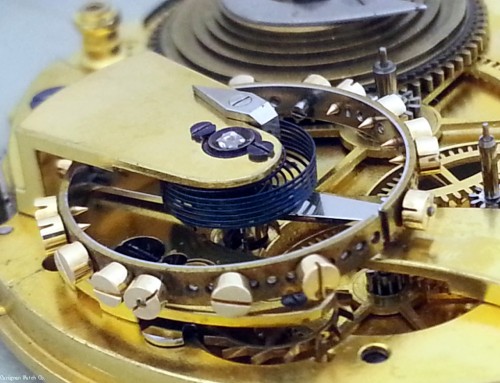
Balance wheel assembly and hairspring
The balance is the heart of the watch. Together with the hairspring, it is the component that makes the movement keep time.
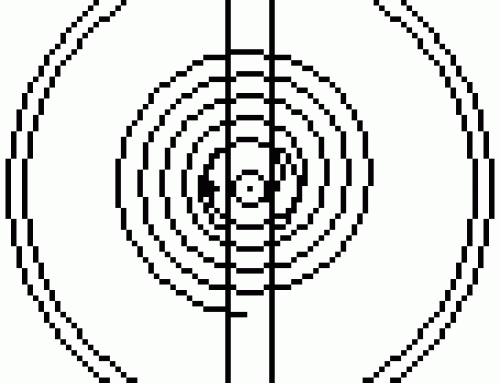
To remove the balance you must first remove the balance cock. To do so, first remove the screw, then place the blade of a screwdriver into the notch at the back of the cock and, with a twisting motion, carefully pry the balance cock away from its seat on the pillar plate. Then, to remove the balance from the cock, you must turn the whole assembly upside down and lay it flat on the bench. Loosen the hairspring stud screw and carefully lift the balance complete off the cock. Some movements have one regulator pin that is bent at it’s end or made to cover the hairspring and keep it from coming out of the pins. For this type, you must turn the regulator pin away so the hairspring can be lifted out of the regulator pins.
To remove the hairspring from the balance, slide a small thin screwdriver blade under the collet at the notch and carefully twist the screwdriver side to side until the collet is free from its seat. A hairspring collet tool can also be used. You wedge this into the notch in the collet and with a twisting motion pull the collet up and off its seat.
Balance Staff
remove train bridge/bridges, remove train wheels, remove pallet bridge,
Watch wheels and bridges diagrams
remove pallets, mark and remove any cap jewels from bridges and plate if shock proof springs are attached such as Incabloc be sure to secure them back into their settings or they will get broken off during the cleaning process, to remove balance from cock loosen hairspring stud screw on balance cock and push stud through with fine needle or broach some regulators have a pin that swings over the hairspring so be sure to swing it away if watch is so equipped, remove jewels from balance cock.
Watch Jeweling and pallets
Clean all teeth and leaves on all wheels and pinions, including mainspring barrel with a glass scratch brush this helps to remove hardened deposits and dirt from between the teeth. Then gently press them into a clean pith wood block.
All jewel and bushing holes should be pegged out with sharpened peg wood to remove any hardened lubricant. Ultrasonically clean and rinse all parts in high quality cleaning and rinsing solutions designed for watch movements I use L&R solutions and equipment.
I use one-dip to final clean the hairspring, jewels and shock proof jeweling.
One-dip also works great to remove any fingerprints and will also cut trough thick hardened grease and grime.
Any finger prints left on parts will cause permanent irreversible damage, so remove them immediately. With practice you will learn how to handle parts and movements without leaving prints. Some people use latex finger guards. Never use cotton gloves to handle parts, you will introduce lint into everything.
Testing procedures.
Check all jewels for looseness or damage such as chips, cracks etc. cracked or otherwise damaged jewels must be replaced.
Worn bushings will need to be removed/reamed and replaced.
Check end and side shake of barrel arbor in barrel, then assemble it between the plate and bridge and check for side and end shake.
Check every wheel and pinion carefully with a powerful loupe for damaged or rusted teeth or leaves. also it is a good idea to check them for truth in truing calipers or a depthing tool, bent or out of round wheels will cause lots of problems and make it imposable to accurately adjust and regulate the movement.
Click the button below to see an animated view of a wheel and pinion with correct depthing
Wheel mounted in the depthing tool to check wheel and pinion depthing and truth
Click the button below to see an animated view of wheels mounted and spinning in the depthing tool
Check each wheel for end shake, side shake, upright, and depthing with its respective pinion. I always assemble the train wheels into the movement one at a time to check each one individually, then I put them in two at a time to check depthing with each other, then I put them all including the barrel in and check them for overall freedom and function by spinning them and observing how they sound and how long they spin with only very slight tickling. I use a very fine wristwatch pivot broach for testing wheel freedom. Also assemble motion work and check for freedom and be sure the cannon pinion has the right amount of tension. Any cap jewels will need to be temporarily assembled to perform these tests. Then remove everything and prepare for next test.
Remove hairspring from balance and check balance for truth in balance calipers.
To check the balance for truth in the flat mount the balance in truing calipers. To check flat swing blade over the rim of the balance and while slowly turning the balance observe the line of light between the balance rim and the blade, if there is any deviation in the thickness of the light line you will need to adjust the balance. Adjust the balance by bending it with your fingers and a balance truing tool which is a lever with notches cut in it’s ends that you can slide over the balance rim or arm giving you leverage and an accurate way to manipulate the balance.
To check the balance for truth in the round follow the instructions above but slide the blade to the side of the balance rim instead of over the top. Adjust the balance in the same manner as described above.
See the illustrations below
Poising the balance
To check the balance for poise means you check to see if it is heavier on one side than the other. The poise of the balance is very important, you will not be able to time the movement to positions other than dial up or dial down if the balance is out of poise. To poise the balance you must first make sure the balance pivots are straight, polished and clean, Now make sure the poising tool is clean and level then set the balance on the poising tool so that only the pivots are resting in the blades of the tool, next take you hand away and let the balance roll freely, when it stops take note of the place on the balance that is farthest down and rotate the balance so that point is on top, then let go of the balance again and if it stops with the place you noted in the same spot as before the balance is probably heavier at that point and needs to be adjusted however it is always a good idea to check this several times until you are absolutely sure before you proceed. To poise the balance you need to take weight away from the heavy point on the balance, you can do this in several different ways but the method I use and find quite satisfactory is to remove weight from the back of the screw where it can’t be seen. I you a screw undercutting tool which only removes material from the inner portion of the back of the screw and leaves the rest of the screw intact, this leaves no marks to be seen from the outside and the balance is left looking untouched. There are other tools that can be used that take material away from the head of the screw, I know of two tools that do this, one of which takes the material away from the outer edge by chamfering it and the other bores a small hole in the center of the head of the screw. One method I do not recommend is filling the heads of the screws down, this method leaves the balance looking hacked and is in my opinion the sign of poor workmanship. Solid balances without screws can be poised by drilling them, usually on the underside of the rim.
When poising the balance remove only very small amounts of material at a time or you will be chasing it around the balance for ever. And remember every bit of weight you remove from the balance will directly affect the rate. Before you start removing weight check to see if any of the screws are loose or missing, check the balance arms to be sure they are not bent, make sure the balance is absolutely clean, check the pivots to be sure they are not bent and also check to see if someone has put a timing washer on only one side of the wheel, any of these things are easy to repair by themselves but if you don’t see them in the beginning you will just be compounding the problem. You can also add weight by using timing washers but as with taking weight away adding weight also affects the rate. If you suspect that one of the screws is not right for the balance, try finding the proper one, even the lightest timing washer will add a surprising amount of weight. Poising a balance is a fairly simple operation when the proper care is taken.
Balance Staff
Assemble jewels into balance cock and plate, then place balance between plate and cock, then check it for freedom by spinning it as described earlier and check it for end and side shake.
Replace hairspring onto balance and back onto balance cock, then place the entire assembly into movement and check the hairspring for truth and flat. Check regulator pins and be sure they are straight and parallel, Check for magnetism use small compass or magnetometer, check for rust on hairspring, Place pallets, escape wheel and train wheels into movement and check the escapement for proper function. Then remove everything and prepare for next test.
Check transmission wheel, washer and boss for wear. (Also known as crown wheel)
Check click for wear.
Assemble barrel bridge onto movement, insert stem and check for wear.
Assemble complete keyless work and check for wear.
Keyless work (winding and setting)
Any rusted parts need to be replaced including screws.
Broken springs or other parts will need to be replaced.
It is very important that you check everything very carefully one thing overlooked will cause problems and big headaches in the future.
The first thing to mention is to use only the highest quality lubricants and in very small quantities. To much oil is far worse than to little. This is only a basic guide and is in no way the last word in oiling.
For average size jeweled gents wrist watch movement
Mainspring- Mainspring grease
Barrel arbor- Pressure resistant oil such as Mobius Microgliss
Center wheel pivots- light clock oil
Third wheel pivots- Fine watch oil
Forth wheel pivots- Fine watch oil
Escape wheel pivots- Fine watch oil
Pallet arbor pivots- Fine watch oil
Balance pivots- Fine watch oil
Pallet stones- Fine watch oil or preferably Mobius 941 escapement oil
Before oiling dip escape wheel, pallets, cap jewels, shock proof jewelling, and sweep wheels in a surface fixative such as Mobius fix-o-drop, this keeps oil from spreading.
Crown wheel- Pressure resistant oil such as Mobius Microgliss
Click- Fine watch oil
Stem pilot, square and bearing- Thick grease like KT-22
Clutch wheel and winding pinion ratchet teeth- Thick grease like KT-22
Yoke pivot- Pressure resistant oil such as Mobius Microgliss
Yoke/setting lever fiction surfaces- Thick grease like KT-22
Set bridge (set lever spring)- Thick grease like KT-22
Setting wheel pivot point- Pressure resistant oil such as Mobius Microgliss
Minute wheel- Pressure resistant oil such as Mobius Microgliss
Cannon pinion outside surface- Pressure resistant oil such as Mobius Microgliss
Cannon pinion/center shaft friction surfaces- Thick grease like Jisma 124
Mainspring- Mainspring grease
Barrel arbor- Pressure resistant oil such as Mobius Microgliss
Center wheel pivots- light clock oil
Third wheel pivots- light clock oil
Forth wheel pivots- Fine watch oil (if jeweled). light clock oil (if not jeweled)
Escape wheel pivots- Fine watch oil
Pallet arbor pivots- Fine watch oil
Balance pivots- Fine watch oil
Pallet stones- Fine watch oil or preferably Mobius 941 escapement oil
Before oiling dip escape wheel, pallets, cap jewels, shock proof jewelling, and sweep wheels in a surface fixative such as Mobius fix-o-drop, this keeps oil from spreading.
Crown wheel- Pressure resistant oil such as Mobius Microgliss
Click- Fine watch oil
Stem pilot, square and bearing- Thick grease like KT-22
Clutch wheel and winding pinion ratchet teeth- Thick grease like KT-22
Yoke pivot- Pressure resistant oil such as Mobius Microgliss
Yoke/setting lever fiction surfaces- Thick grease like KT-22
Set bridge (set lever spring)- Thick grease like KT-22
Setting wheel pivot point- Pressure resistant oil such as Mobius Microgliss
Minute wheel- Pressure resistant oil such as Mobius Microgliss
Cannon pinion outside surface- Pressure resistant oil such as Mobius Microgliss
Cannon pinion/center shaft friction surfaces- Thick grease like Jisma 124
For small ladies watch movements
Mainspring- Mainspring grease
Barrel arbor- Pressure resistant oil such as Mobius Microgliss
Center wheel pivots- Fine watch oil
Third wheel pivots- Fine watch oil
Forth wheel pivots- Fine watch oil
Escape wheel pivots- Fine watch oil
Pallet arbor pivots- Fine watch oil
Balance pivots- Fine watch oil
Pallet stones- Fine watch oil or preferably Mobius 941 escapement oil
Before oiling dip escape wheel, pallets, cap jewels, shock proof jewelling, and sweep wheels in a surface fixative such as Mobius fix-o-drop, this keeps oil from spreading.
Crown wheel- Pressure resistant oil such as Mobius Microgliss
Click- Fine watch oil
Stem pilot, square and bearing- Thick grease like KT-22
Clutch wheel and winding pinion ratchet teeth- Thick grease like KT-22
Yoke pivot- Pressure resistant oil such as Mobius Microgliss
Yoke/setting lever fiction surfaces- Thick grease like KT-22
Set bridge (set lever spring)- Thick grease like KT-22
Setting wheel pivot point- Light clock oil
Cannon pinion outside surface- light clock oil
Cannon pinion/center shaft friction surfaces- Thick grease like Jisma 124
Larger pocket watch and tiny ladies watch movements may require different oils.
Movements with special functions or unordinary parts may require different oils.


